
CI/CD is one of those things that pays for itself almost immediately. In serverless especially, where the whole point is to focus on code and let the platform handle the rest, automating your deployment pipeline is a no-brainer. It lets developers focus on code and lets the business ship quality software faster. So how does that work with Akka Serverless?
Akka Serverless brings together Functions-as-a-Service and serverless databases into a single package, so developers don’t have to worry about the database layer either. In this post, I’ll walk through automating the CI/CD workflow for Akka Serverless using GitHub Actions.
The GitHub Actions #
The pipeline uses four GitHub Actions:
- Docker Login to authenticate with Docker Hub (or any supported Docker registry)
- Docker Setup Buildx which uses BuildKit and enables multi-platform image builds (out of scope here, but nice to have)
- Build and push Docker images to push the image to Docker Hub
- Akka Serverless CLI for GitHub Actions to deploy to Akka Serverless
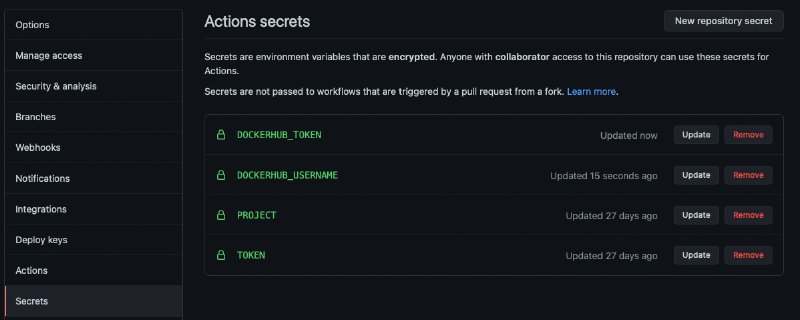
For security, store credentials as encrypted secrets in GitHub. Under Settings -> Secrets, create four variables:
- DOCKERHUB_TOKEN: a personal authentication token for Docker Hub (strongly recommended over a password)
- DOCKERHUB_USERNAME: your Docker Hub username
- PROJECT: the Akka Serverless project ID (
akkasls projects get <project name>shows the ID) - TOKEN: an Akka Serverless authentication token with execution scope (create one with
akkasls auth tokens create --type=refresh --scopes=execution --description="My CI/CD token")
The YAML #
With the secrets in place, the only thing left is the GitHub Actions workflow file. I’ll show the complete file first, then break it down. Store it in .github/workflows in your repository.
The full file #
I named mine deploy.yaml:
name: akkasls-deployer

on:
  push:
    branches: [ main ]
  workflow_dispatch:

jobs:
  build:
    runs-on: ubuntu-latest

    steps:
      - name: Checkout
        uses: actions/checkout@v2
      - name: Set up Docker Buildx
        uses: docker/setup-buildx-action@v1
      - name: Login to Docker Hub
        uses: docker/login-action@v1
        with:
          username: ${{ secrets.DOCKERHUB_USERNAME }}
          password: ${{ secrets.DOCKERHUB_TOKEN }}
      - name: Build and push to Docker Hub
        uses: docker/build-push-action@v2
        with:
          push: true
          tags: retgits/myapp:1.0.0
      - name: Deploy to Akka Serverless
        uses: retgits/akkasls-action@v1
        with:
          cmd: "services deploy myapp retgits/myapp:1.0.0"
        env:
          token: ${{ secrets.TOKEN }}
          project: ${{ secrets.PROJECT }}
Breaking up the file in parts #
Here’s what each section does:
name: akkasls-deployer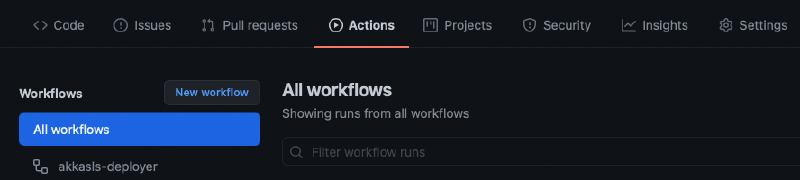
This sets the workflow name as it appears in the Actions tab of your repository.
on:
  push:
    branches: [ main ]
  workflow_dispatch:
The on section defines triggers. This workflow runs on every push to main, or when manually triggered via workflow_dispatch (handy when you want to redeploy without a code change).

jobs:
  build:
    runs-on: ubuntu-latest
I run builds on Ubuntu. You could use a different OS or a self-hosted runner.
steps:
  - name: Checkout
    uses: actions/checkout@v2
Checks out the code so subsequent steps can access it.
  - name: Set up Docker Buildx
    uses: docker/setup-buildx-action@v1
Sets up Buildx for multi-platform image builds (especially useful for Apple Silicon containers).
  - name: Login to Docker Hub
    uses: docker/login-action@v1
    with:
      username: ${{ secrets.DOCKERHUB_USERNAME }}
      password: ${{ secrets.DOCKERHUB_TOKEN }}
Logs in to Docker Hub using the secrets we created earlier.
  - name: Build and push to Docker Hub
    uses: docker/build-push-action@v2
    with:
      push: true
      tags: retgits/myapp:1.0.0
Builds the container and pushes it to Docker Hub as retgits/myapp:1.0.0. In practice, you’d want to parameterize this with the git tag, commit SHA, or something else to uniquely identify each image.
  - name: Deploy to Akka Serverless
    uses: retgits/akkasls-action@v1
    with:
      cmd: "services deploy myapp retgits/myapp:1.0.0"
    env:
      token: ${{ secrets.TOKEN }}
      project: ${{ secrets.PROJECT }}
The final step deploys the container image to Akka Serverless using the other two secrets and the same tag from the previous step.
What’s next? #
That’s the whole setup. Once it’s in place, every push to main builds a container and deploys it to Akka Serverless automatically. Set it up once and forget about it. Let me know what you’d like to see next!
Cover photo by Gerd Altmann from Pixabay


