How To Send Emails Using Flogo Apps in TIBCO Cloud Integration
Learn how to enhance your integration flows with effective communication using the Send Email activity in TIBCO Cloud Integration. This tutorial guides you through the process of sending emails, using Gmail as a provider, with clear visual instructions.

Communication in our daily life is incredibly important, so why should that be any different when you’re building integration processes? Sending emails is still considered an important part of day to day operations. For example when errors occur in your integration flows, you might want to send an email. In this tutorial I’ll walk you through sending an email, and in my case I’ll use Gmail as provider.
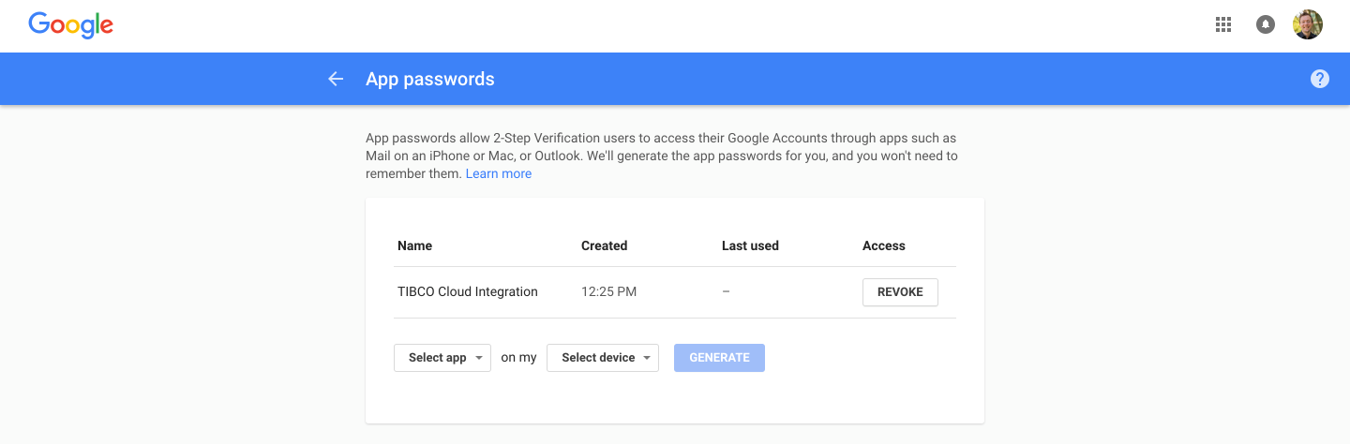
Note: you might need to create an ‘App Specific Password’ if your account uses two-factor authentication
Rather than a lot of text, I thought it would be nice to see a lot of pictures this time around :)
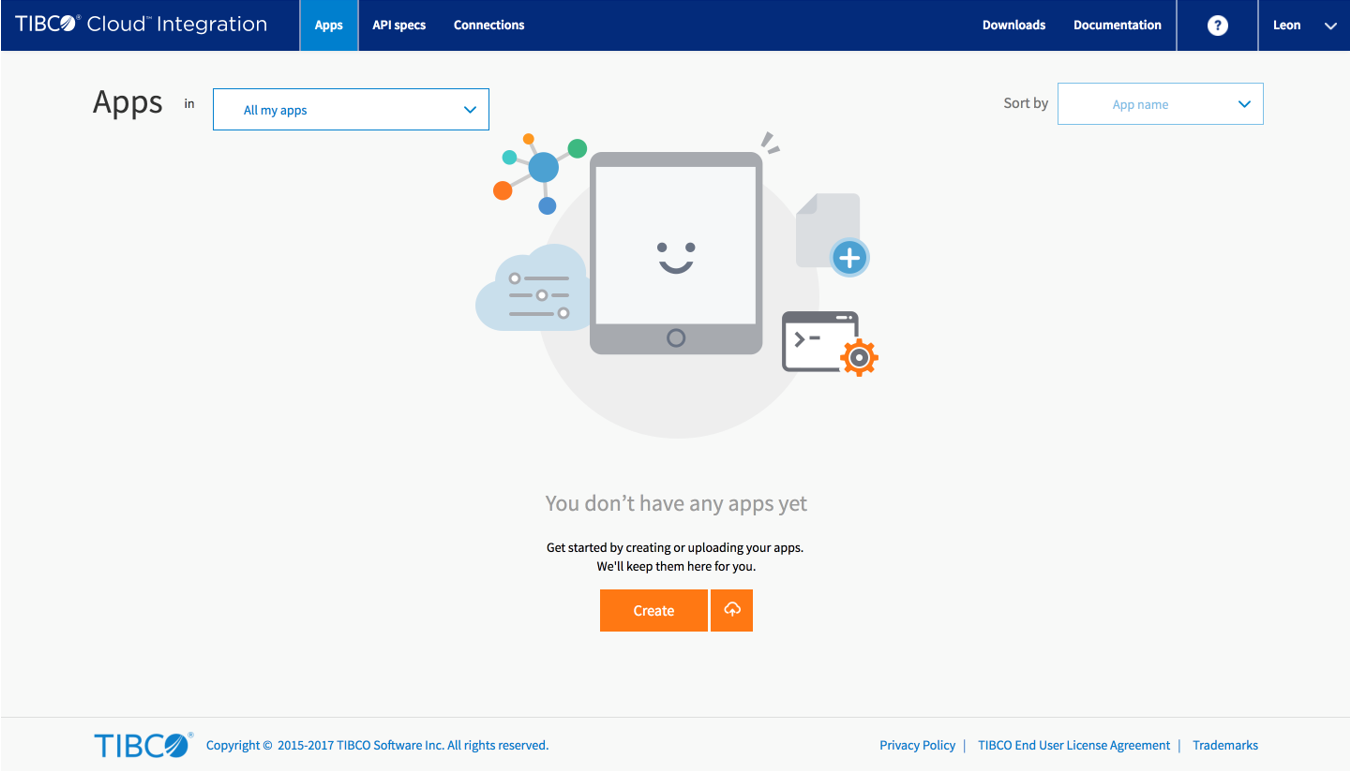
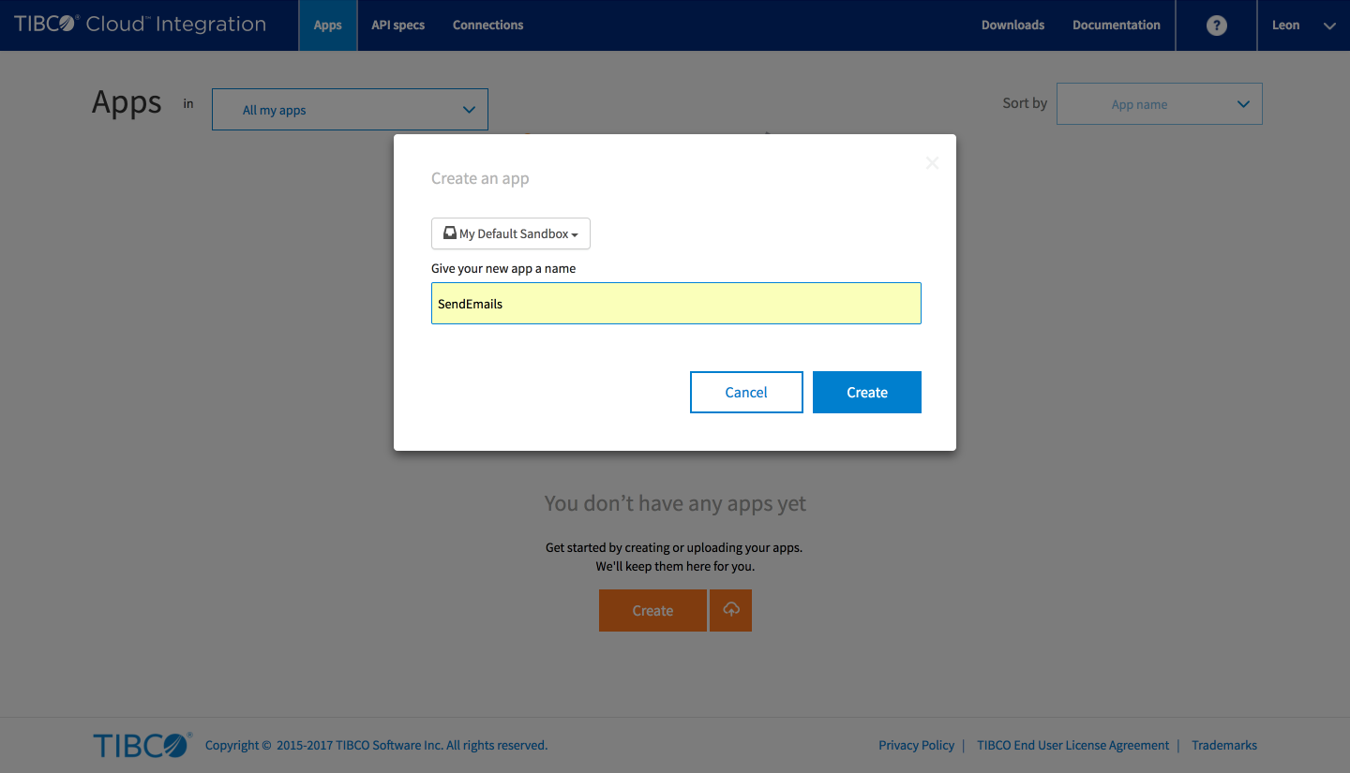
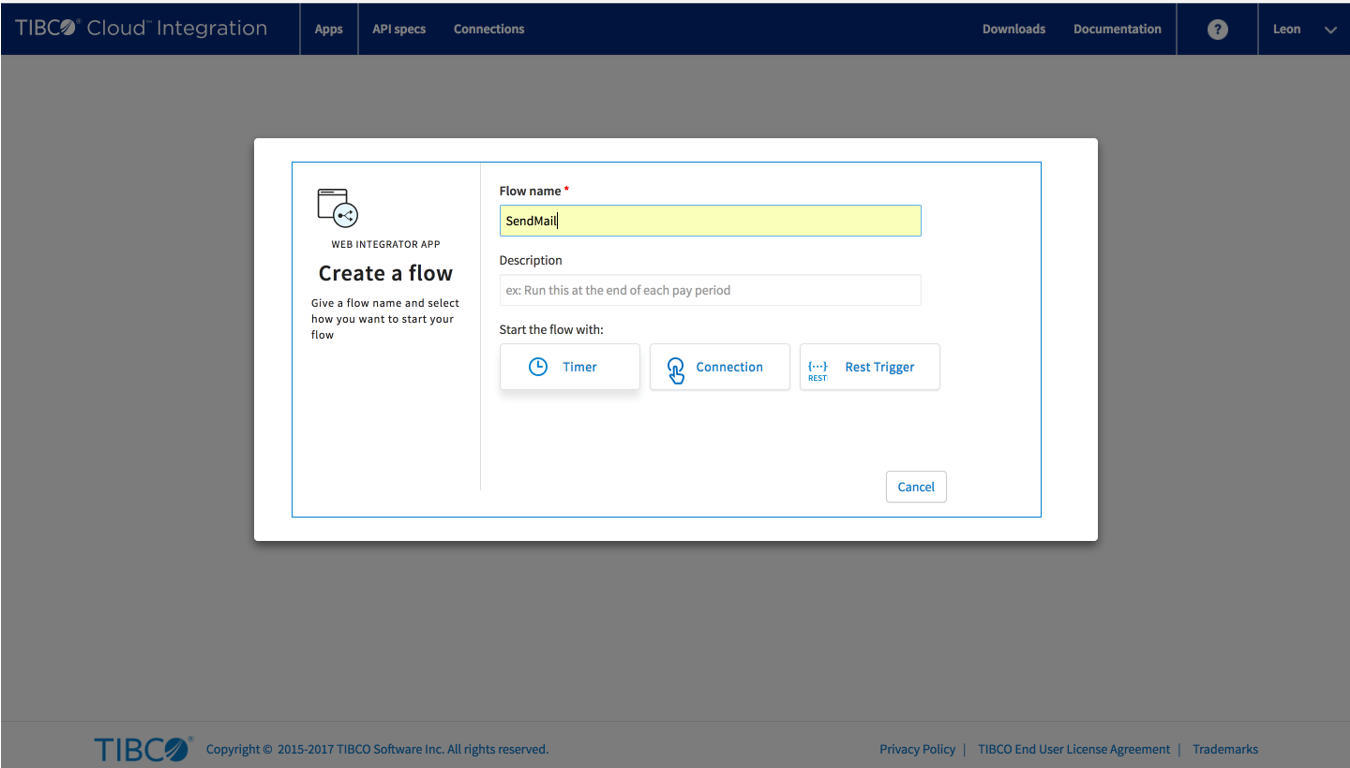
Create a new app
Give the app a name
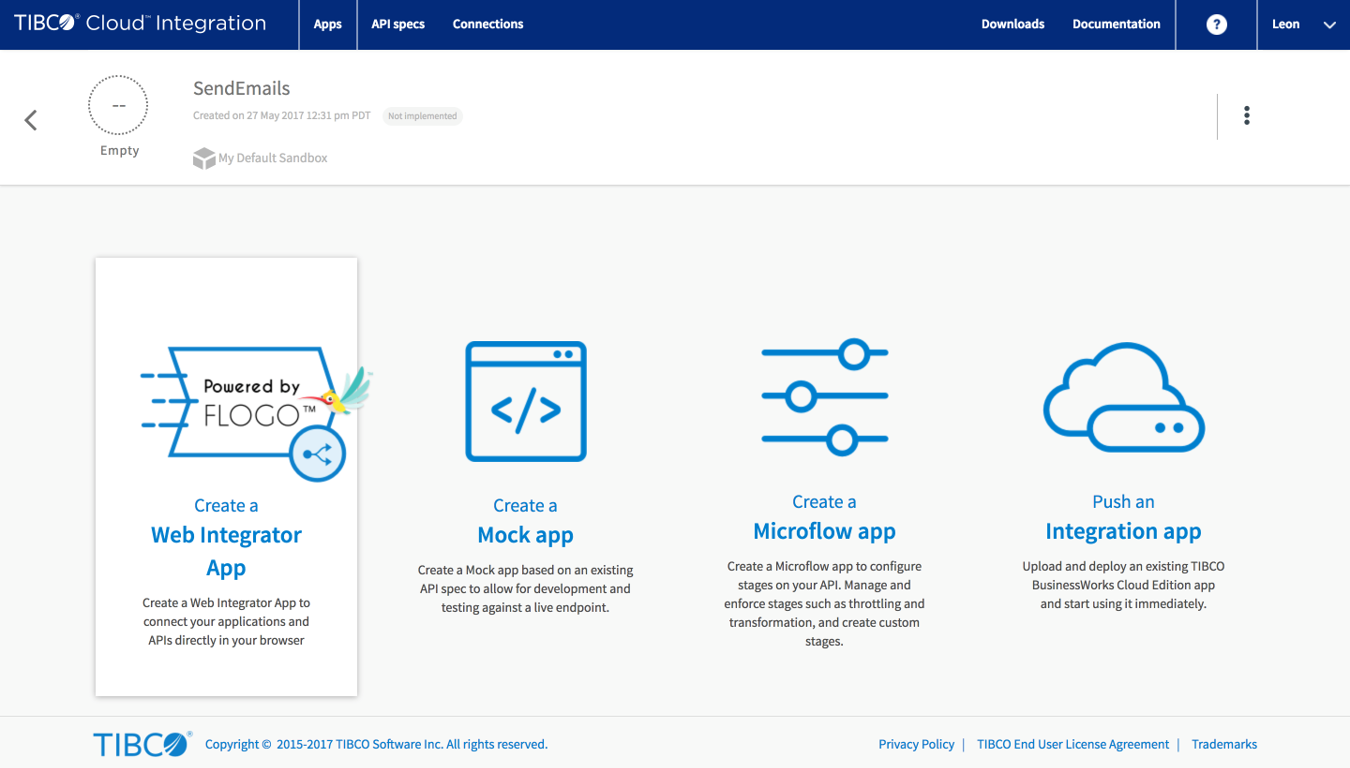
Choose the Web Integrator App type
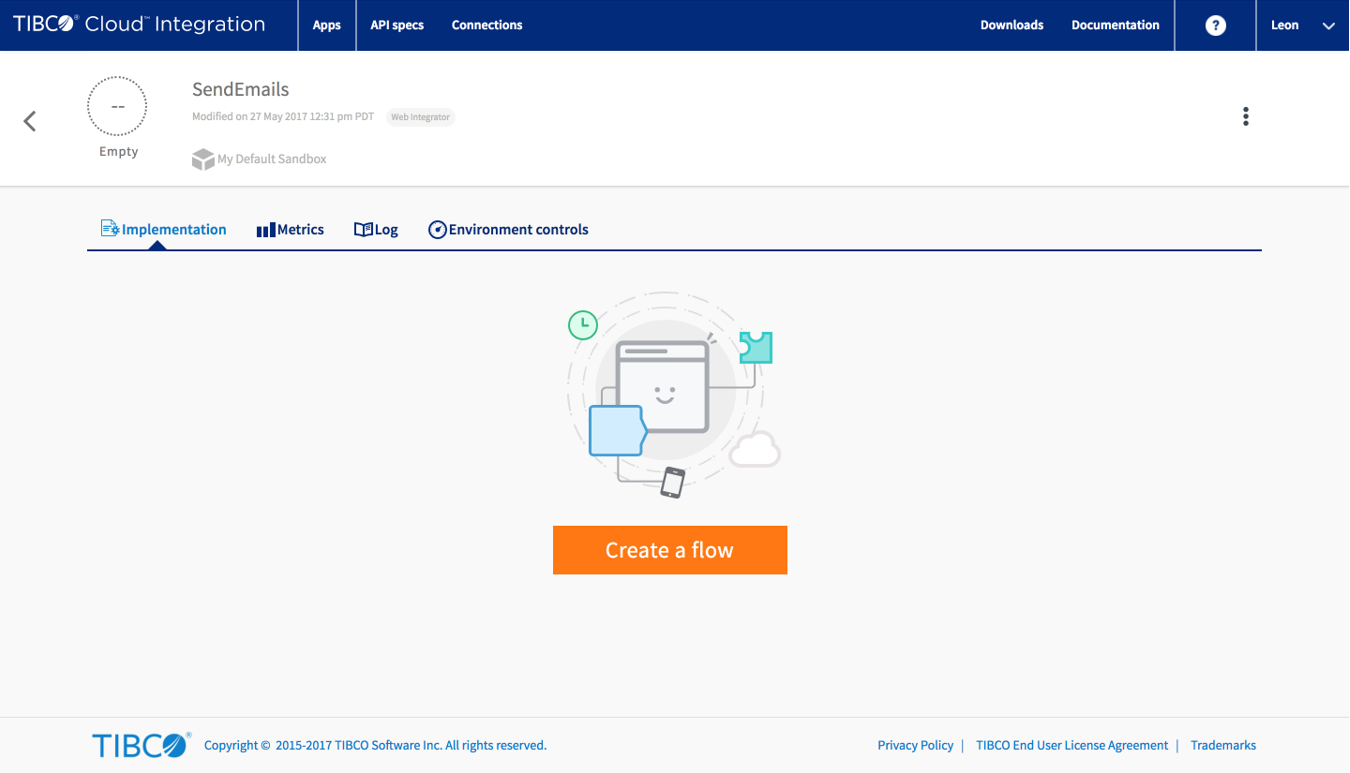
Create a new flow
Give the flow a name and select the Timer to start
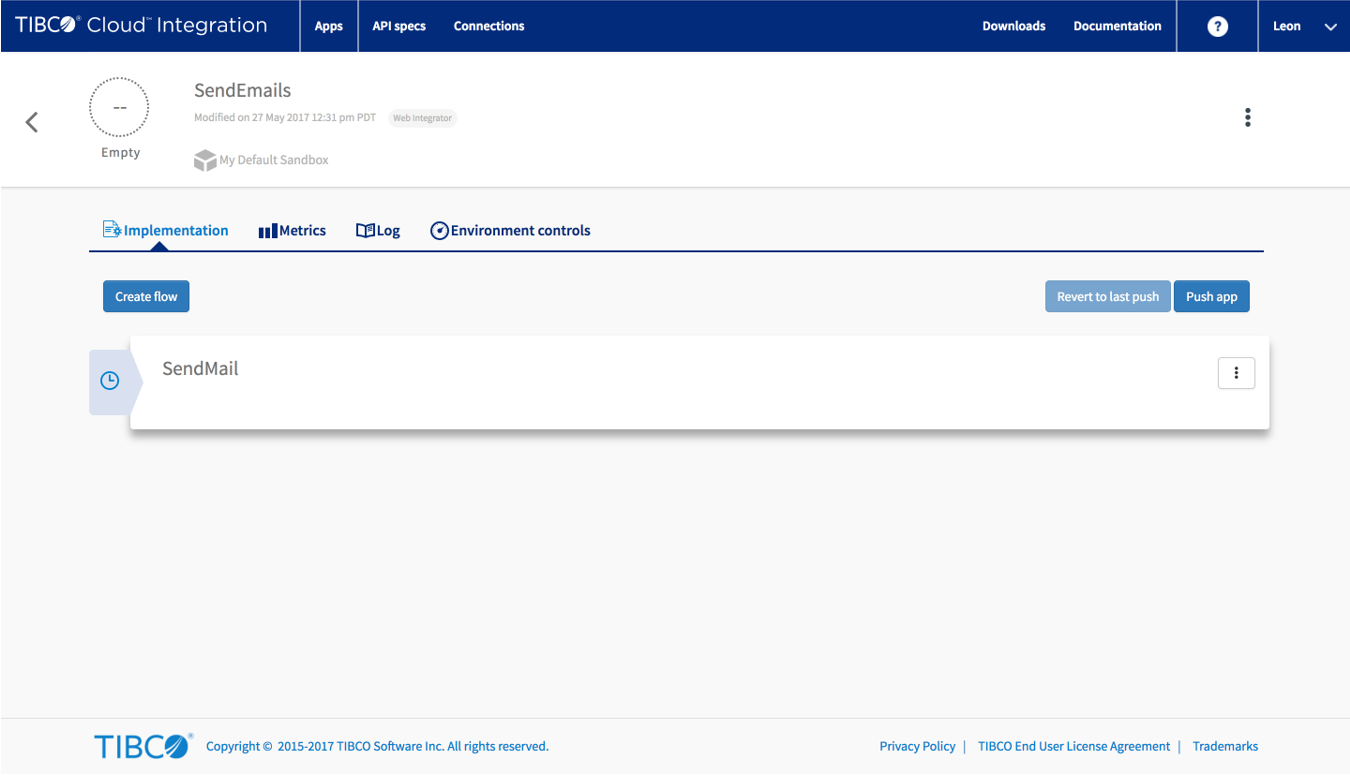
Click on the newly created flow
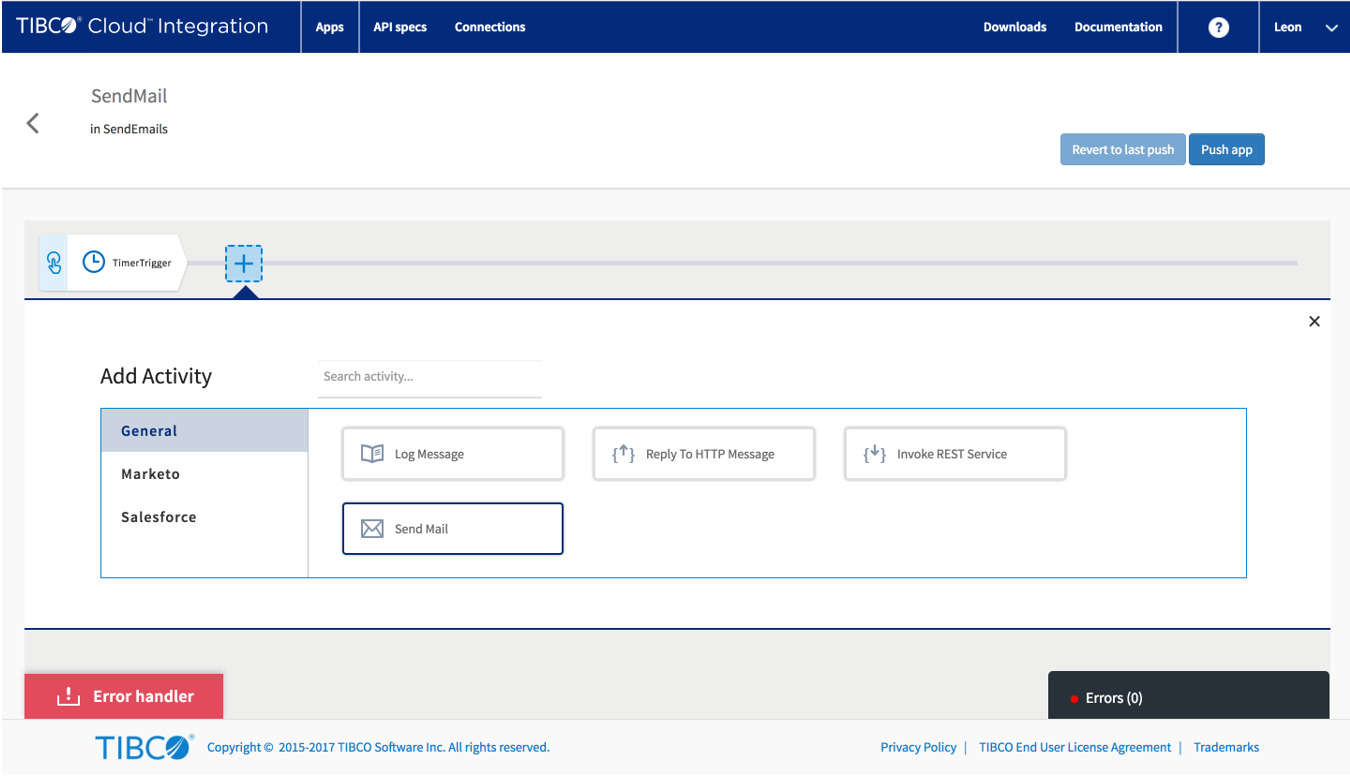
Add a ‘Send Mail’ activity
Configure the properties
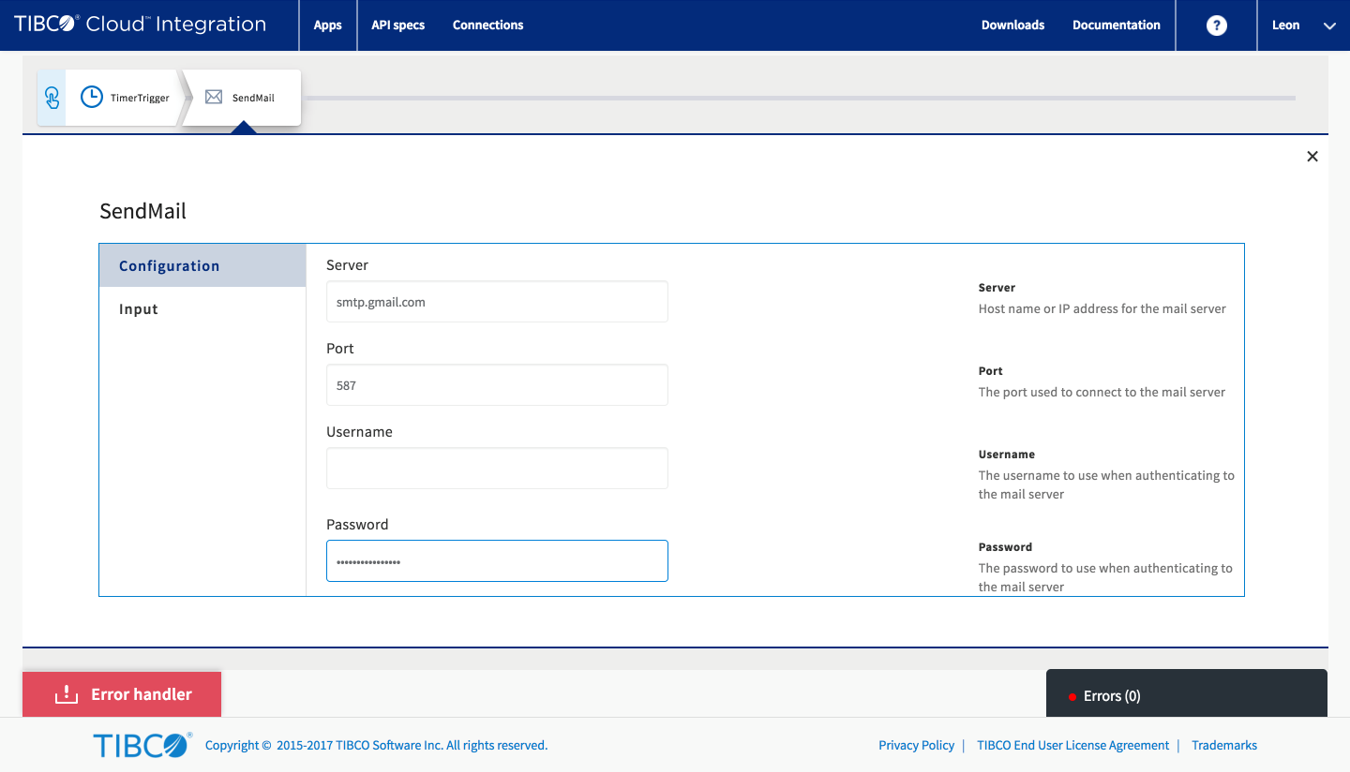 Note: This slide uses Gmail, though you can use any other mail provider as well
App specific passwords
If your email account uses two-factor authentication you need to create an ’App Password’ like here for Gmail
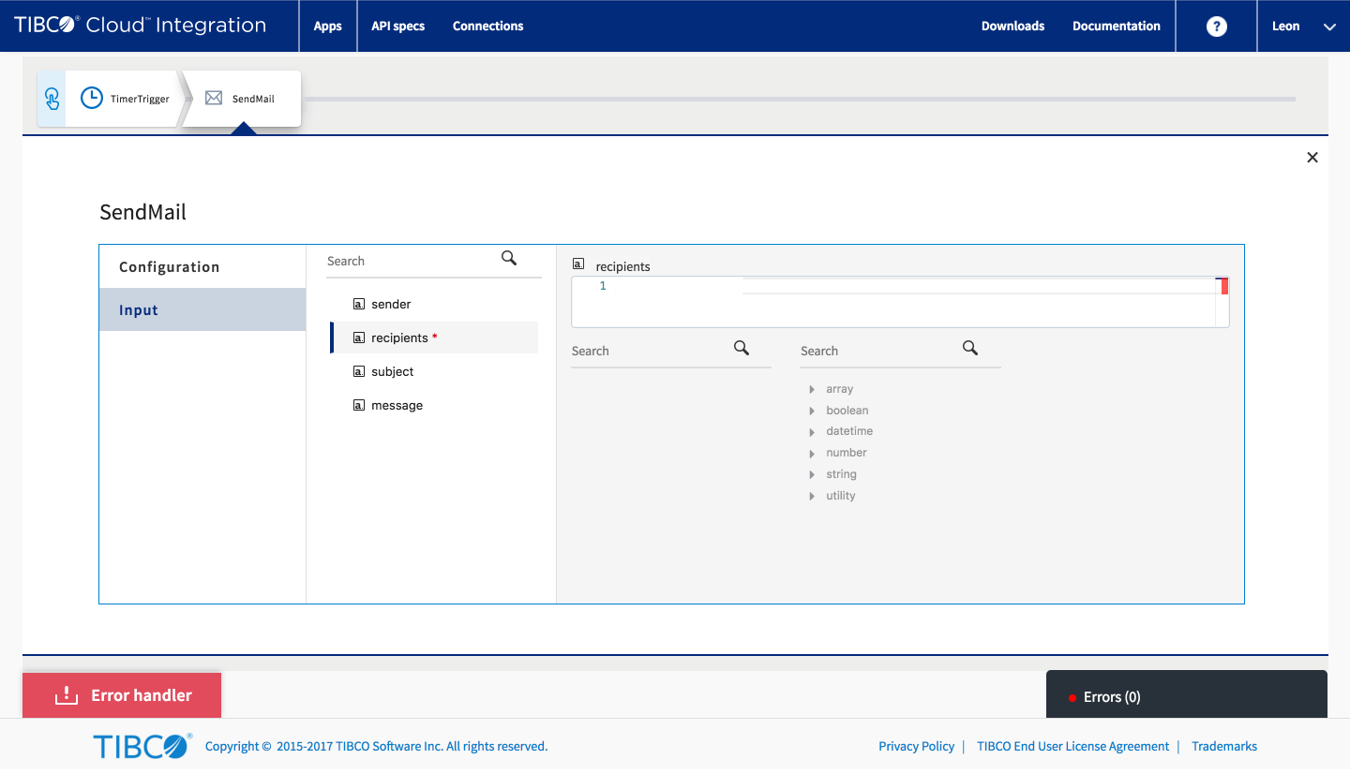
Add receivers
On the ‘Input’ add the recipients (comma separated if you want more than one)
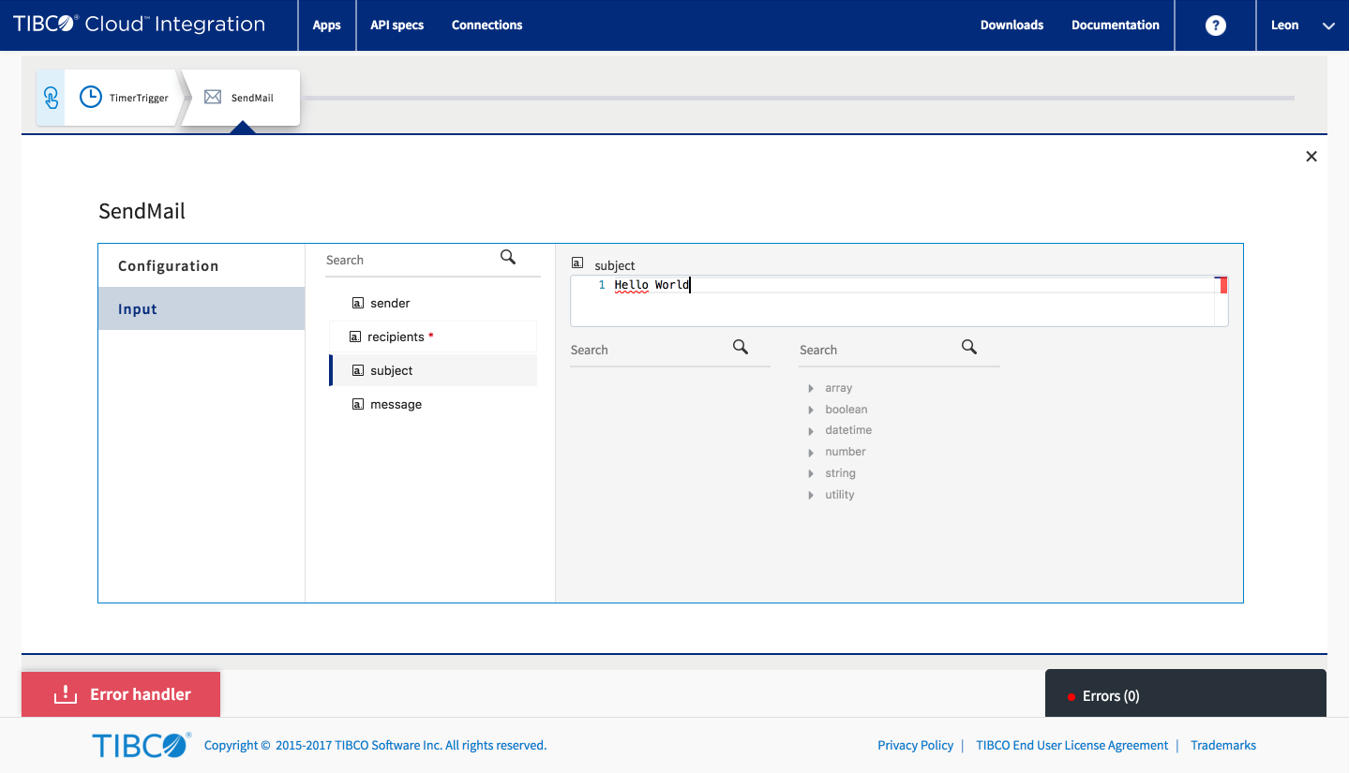
The subject
The next step is to add the subject line
Your message
Finally input the message that you want to send

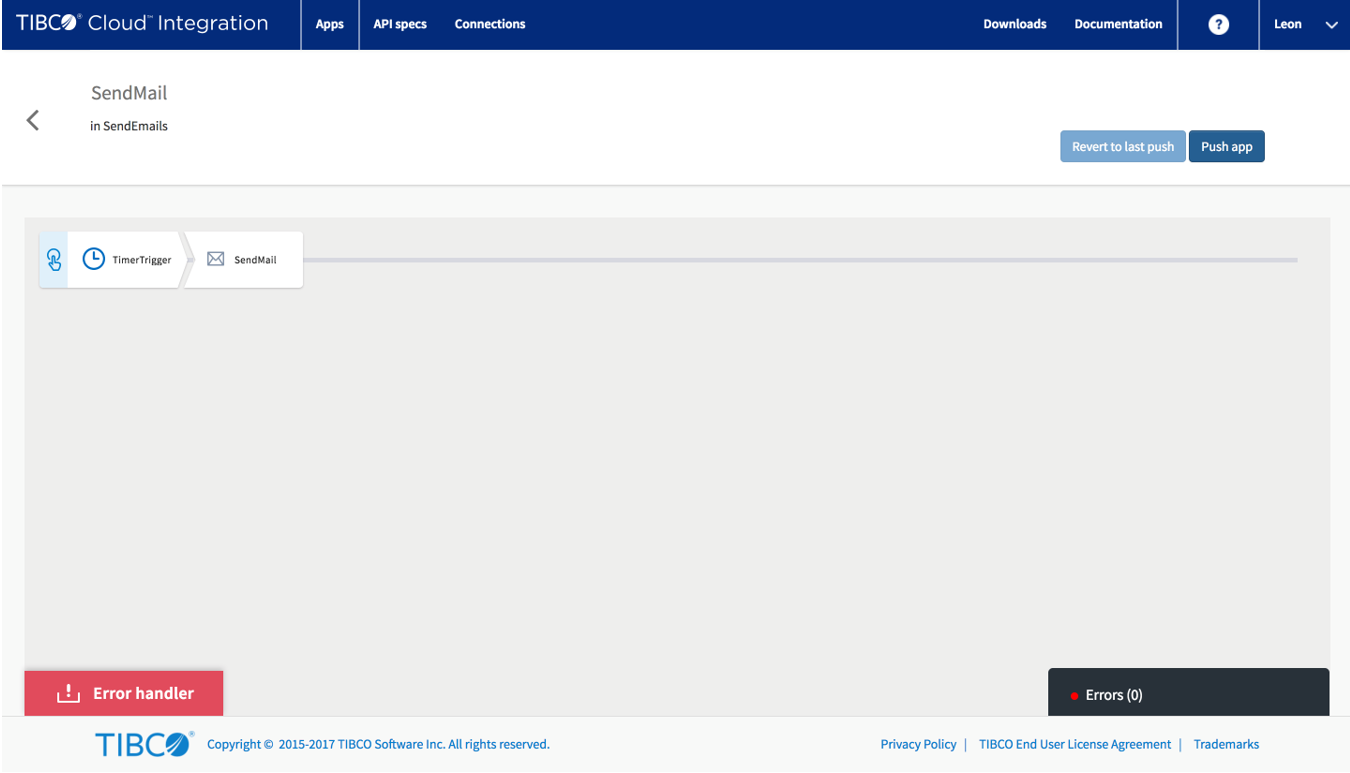
Push the App
Conclusion
In a few seconds your app will start and send you an email! Let me know your thoughts on this tutorial either by commenting below or posting something on the TIBCO Community!