How To Combine APIs With Flogo Apps In TIBCO Cloud Integration
Embark on a visual journey to orchestrate APIs effortlessly! Learn how TIBCO Cloud Integration's Web Integrator leverages Project Flogo to streamline API integration, offering a seamless flow for extracting and utilizing data.

In 2002 Jeff Bezos issued a mandate that would change the world forever. At the very least it brought a massive change to how data is reused on the Internet. The mandate from Jeff Bezos was:
- All teams will henceforth expose their data and functionality through service interfaces.
- Teams must communicate with each other through these interfaces.
- There will be no other form of inter-process communication allowed: no direct linking, no direct reads of another team’s data store, no shared-memory model, no back-doors whatsoever. The only communication allowed is via service interface calls over the network.
- It doesn’t matter what technology they use.
- All service interfaces, without exception, must be designed from the ground up to be externalizable. That is to say, the team must plan and design to be able to expose the interface to developers in the outside world. No exceptions.
- Anyone who doesn’t do this will be fired. Thank you; have a nice day!
That mandate started a great deal of what we see as the API economy today. Many of the worlds’ enterprises have APIs available that can deliver data so you can focus on building value, rather than worrying about how to get the data. Having said all that, most APIs that are out there are documented but don’t have a swagger.json that you can import in your code. The Web Integrator in TIBCO Cloud Integration gives you the ability to copy and paste the sample messages that those APIs do have and use that as the base to invoke REST APIs.
Rather than a lot of text, I thought it would be nice to see a lot of pictures this time around :) Also, in this sample I’ll use the MetaWeather API
Create your app
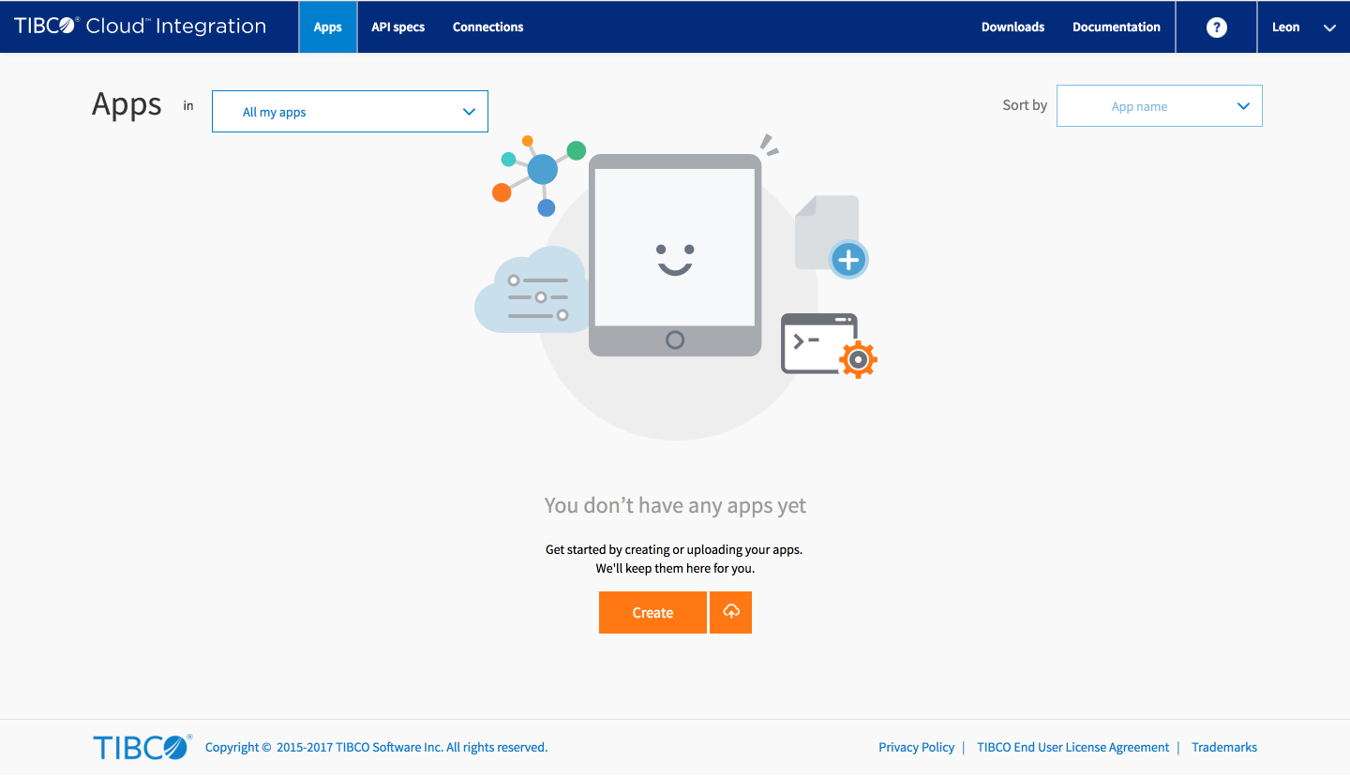
Step 1: Create an app!
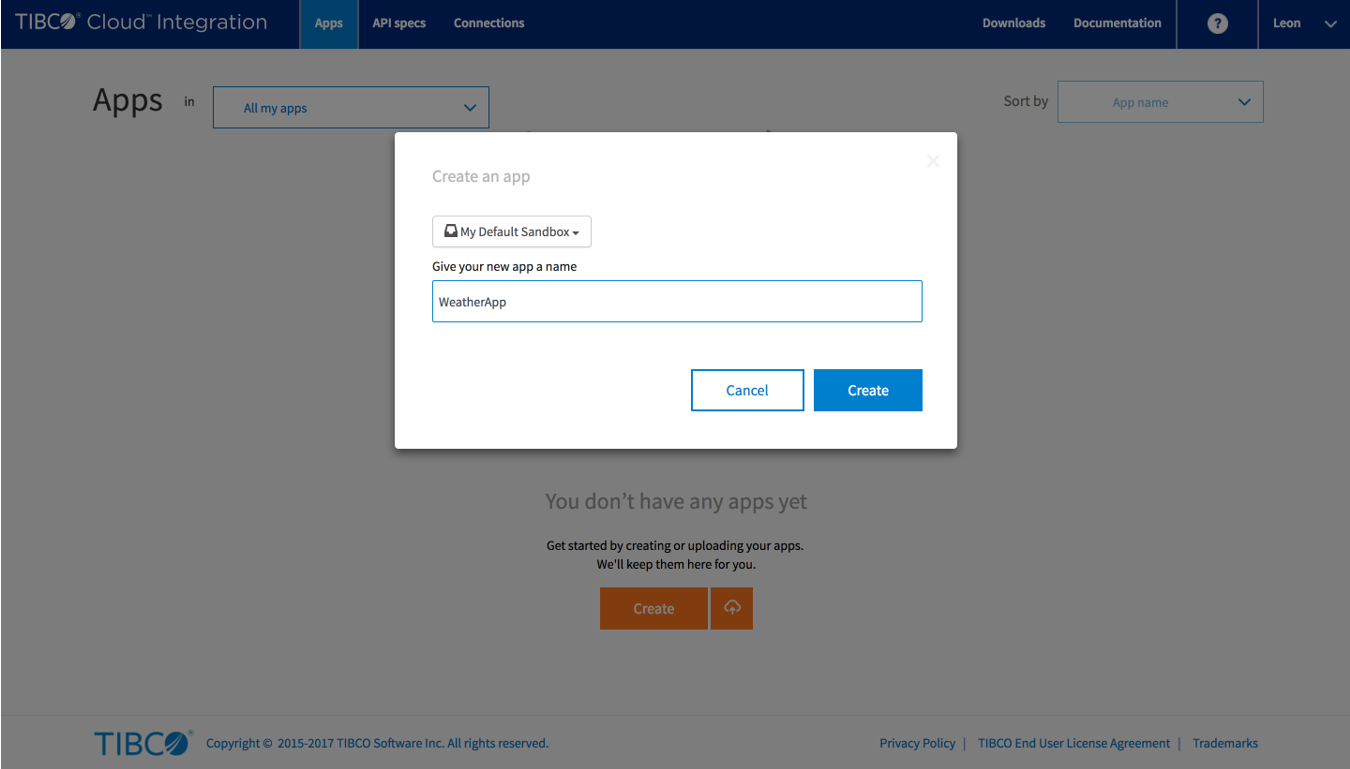
 Step 2: Give the app a name, make it something meaningful like
 WeatherApp ;-)
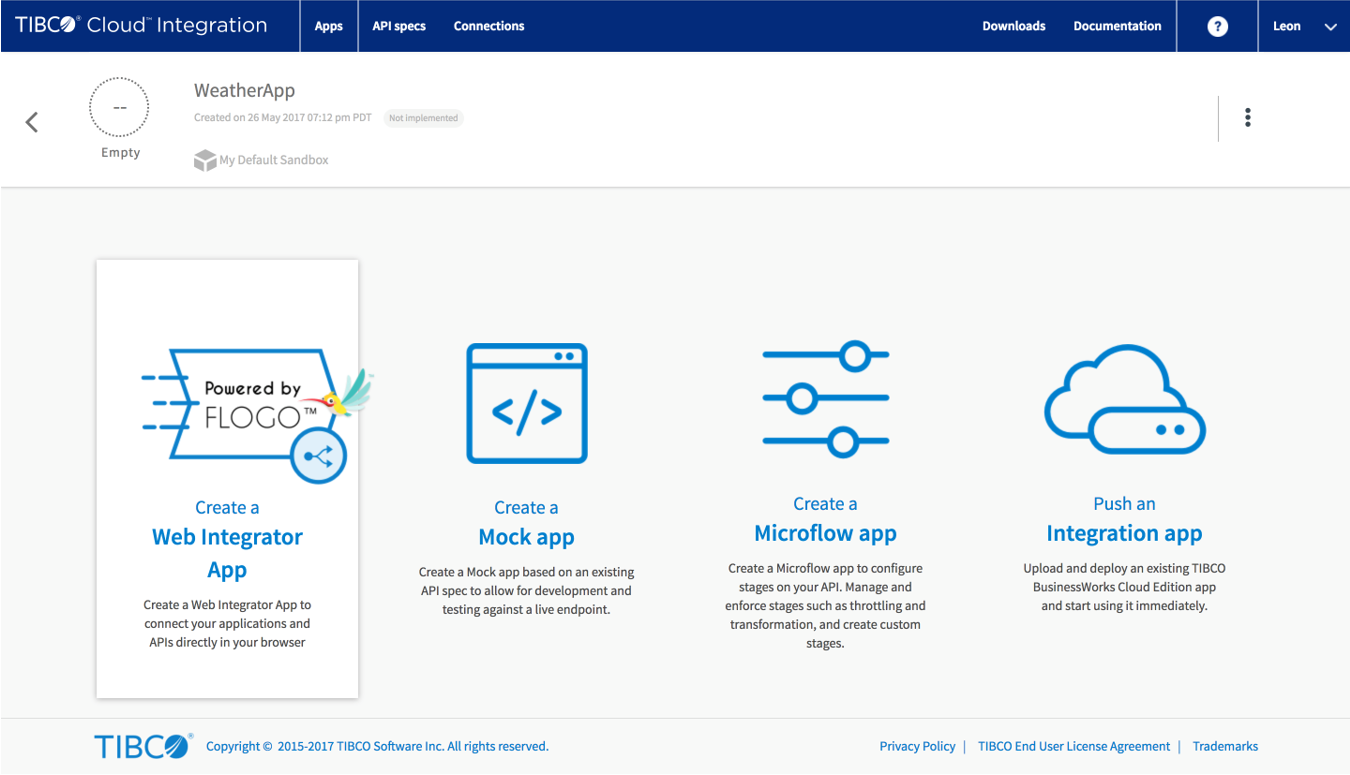
 Step 3: Choose the Web Integrator (powered by Project Flogo) as the type
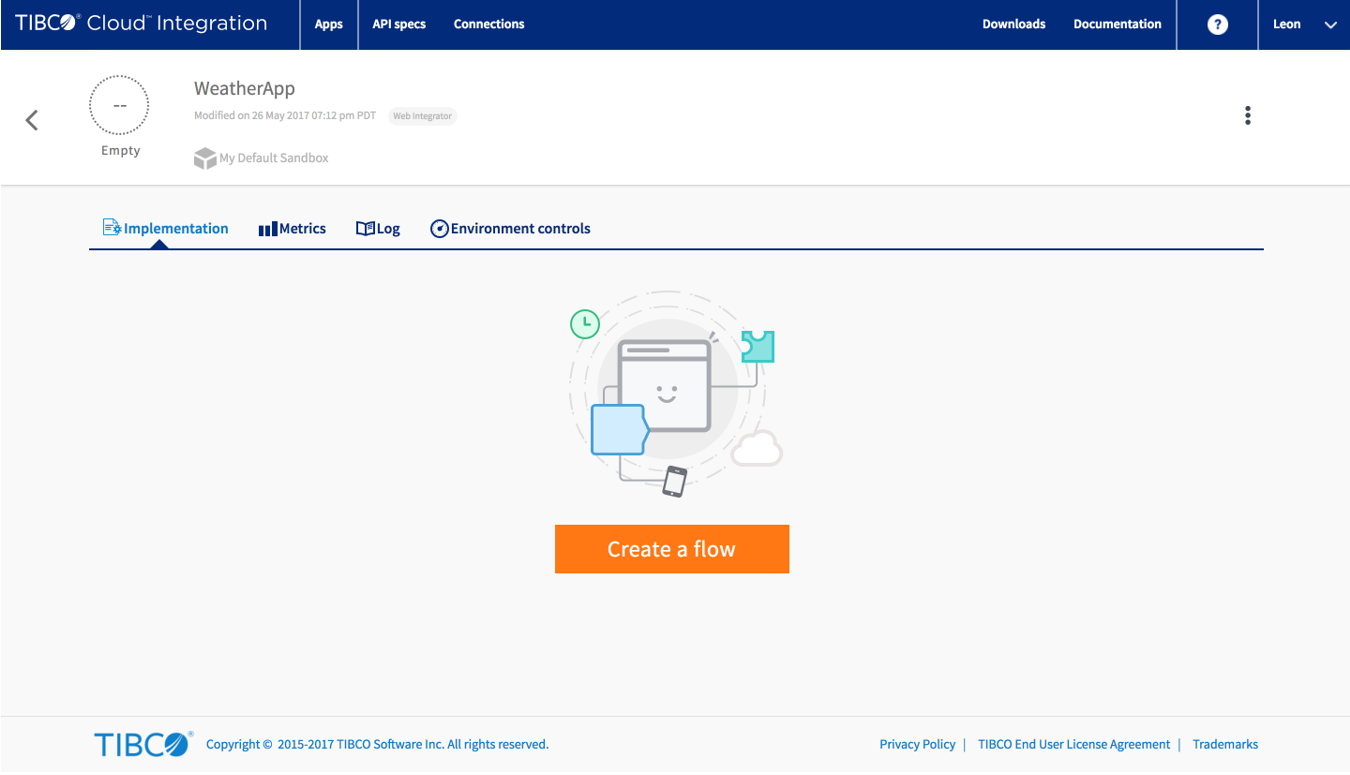
 Step 4: Create a new flow in your new Web Integrator app
 Step 5: Give your flow a name and select the Timer to start, after all who doesn’t like a good timer?
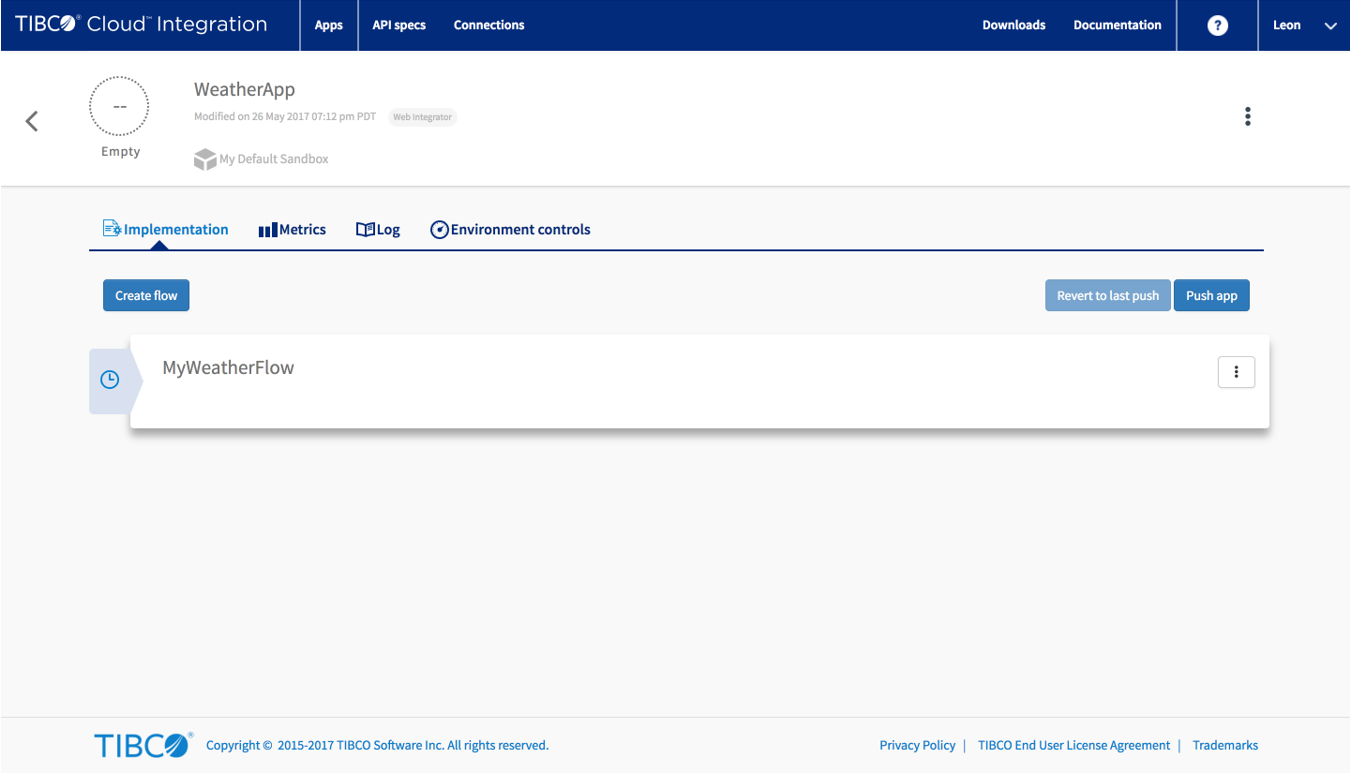
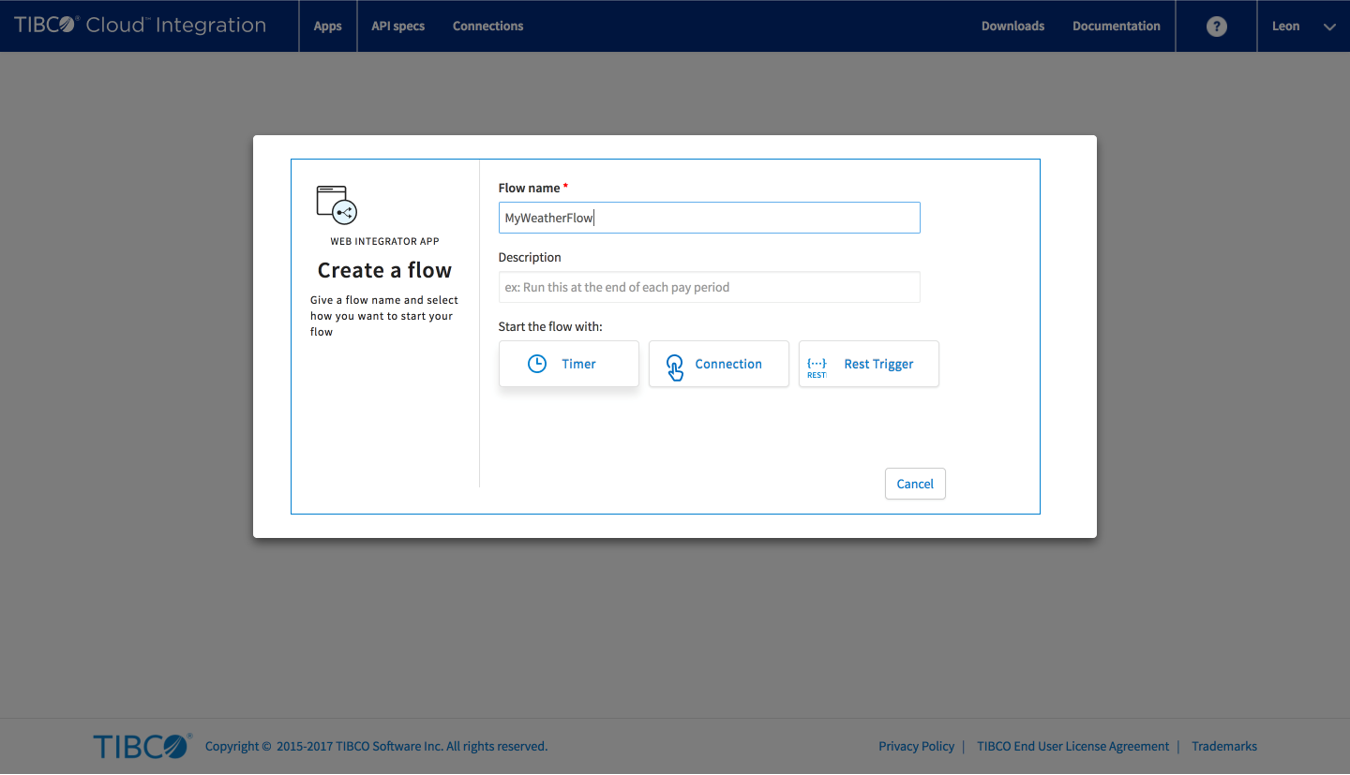 Step 6: Click on your new flow to open the editor. For now it will have only a single tile, but when we’re done there will definitely be a few more!
Getting data from Meta Weather
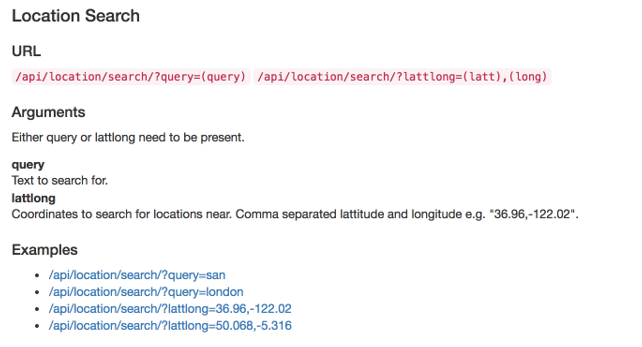
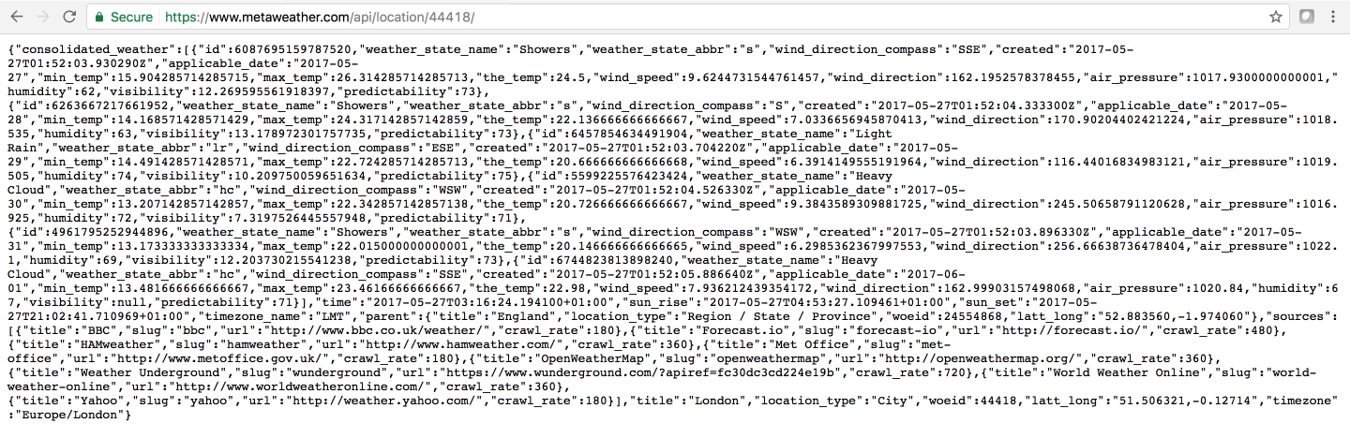
Step 7: Check out the MetaWeather API Location search.
The URL pattern is /api/location/search/?query
 Step 8: Let’s go with a sample for London! This is what a sample response looks like
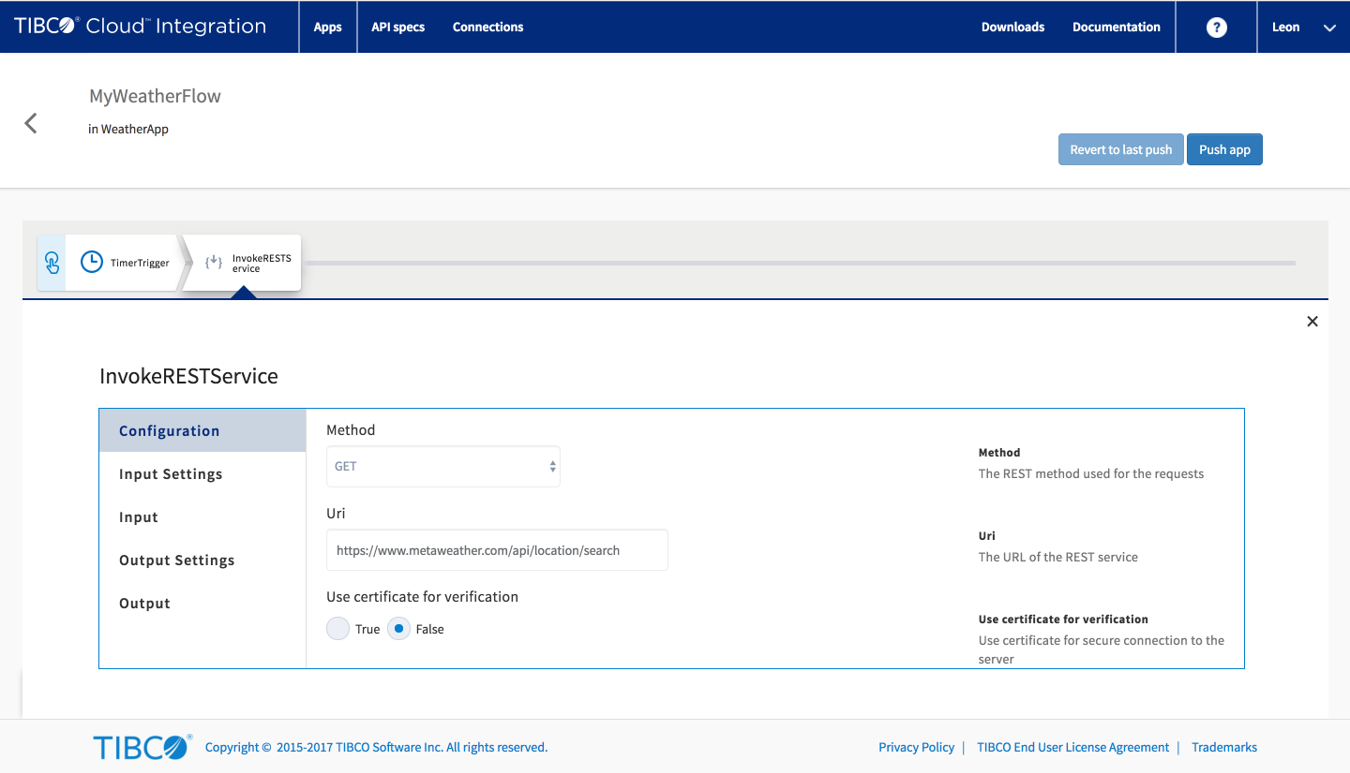
 Step 9: Add a
 InvokeRESTService tile and paste the URL for the location search, without the query. So the URL will be https://www.metaweather.com/api/location/search
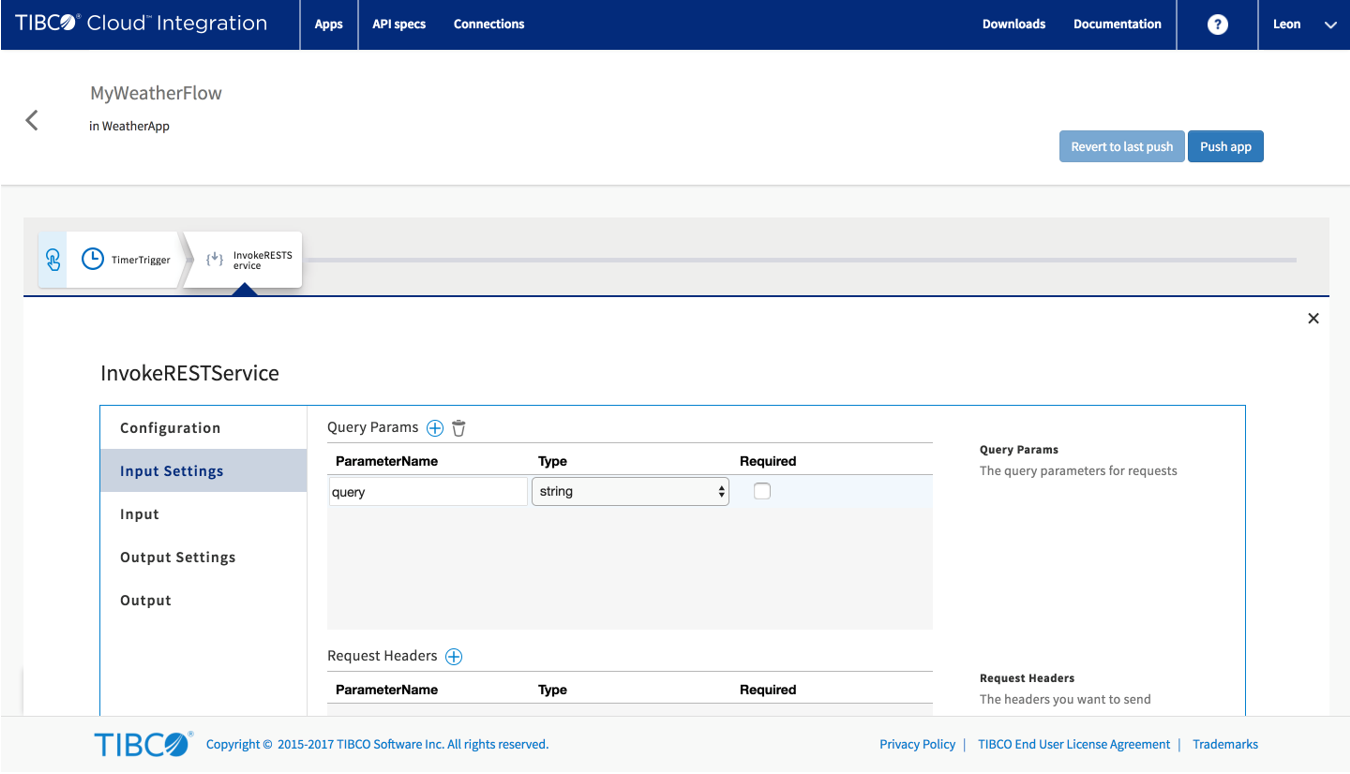
 Step 10: On the Input Settings tab, add an entry in the Query Params (the query parameters) called
 query. This will let your tile know that it should expect a new parameter
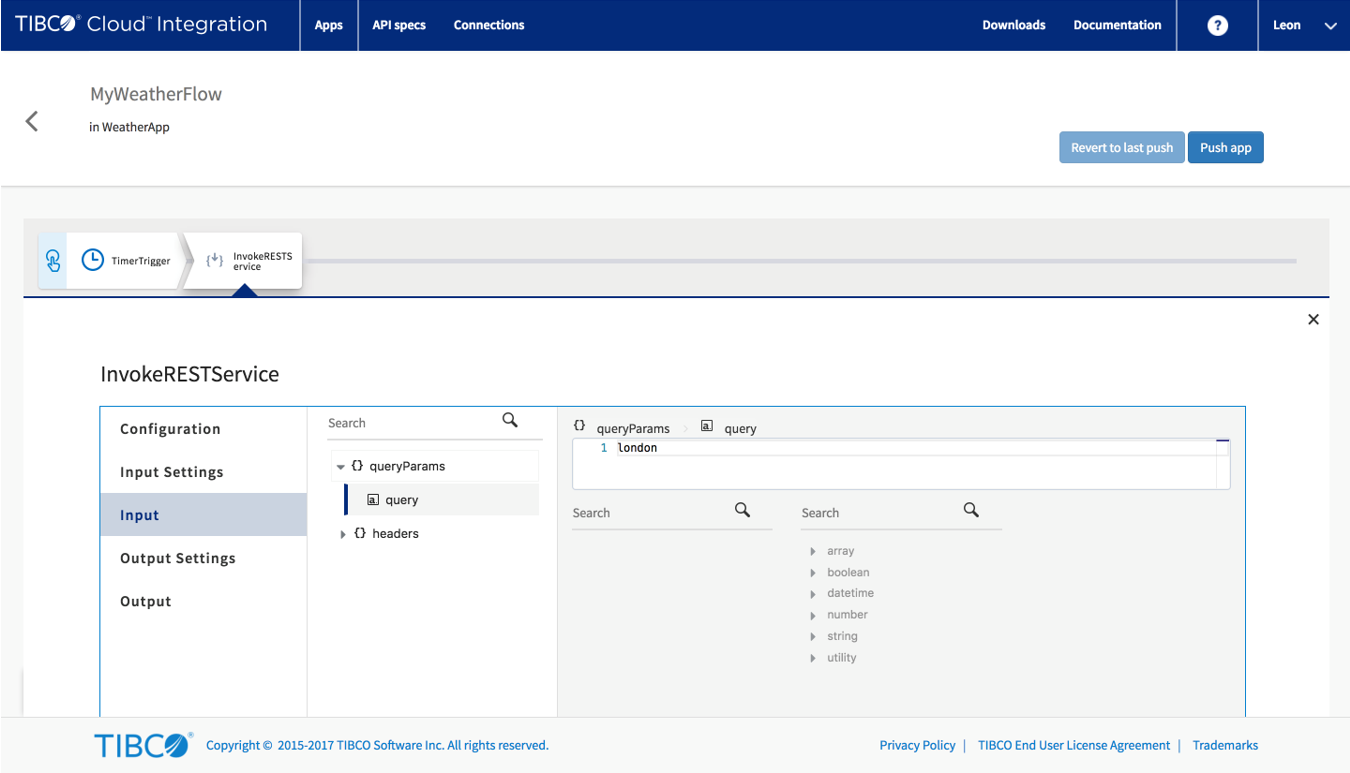
 Step 11: On the Input tab, give your new query parameter a value. Simply expand the queryParams, select your parameter and give it a value by typing it in the box on the right. I kinda like London so I’ll keep that one.
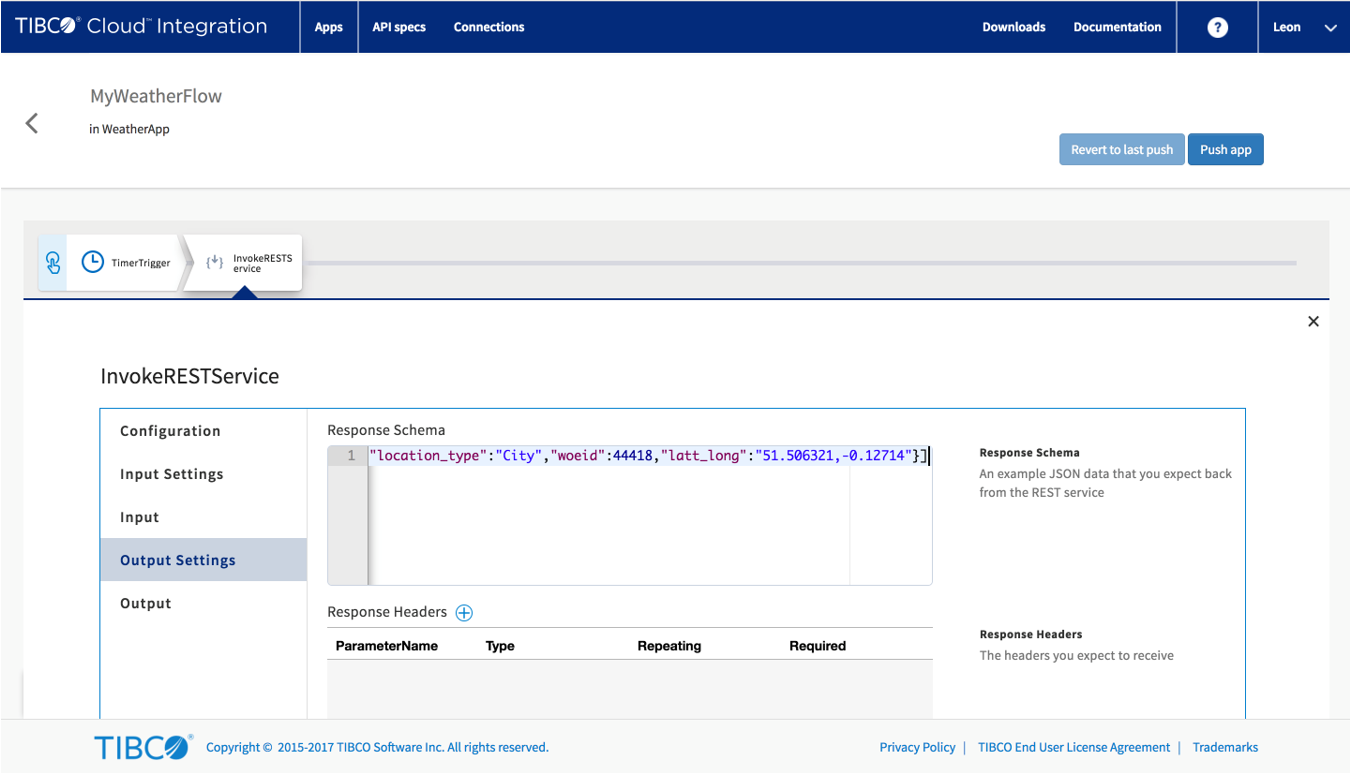
 Step 12: On the Output Settings, paste the sample response from the MetaWeather API (the data we gathered earlier in step 8)
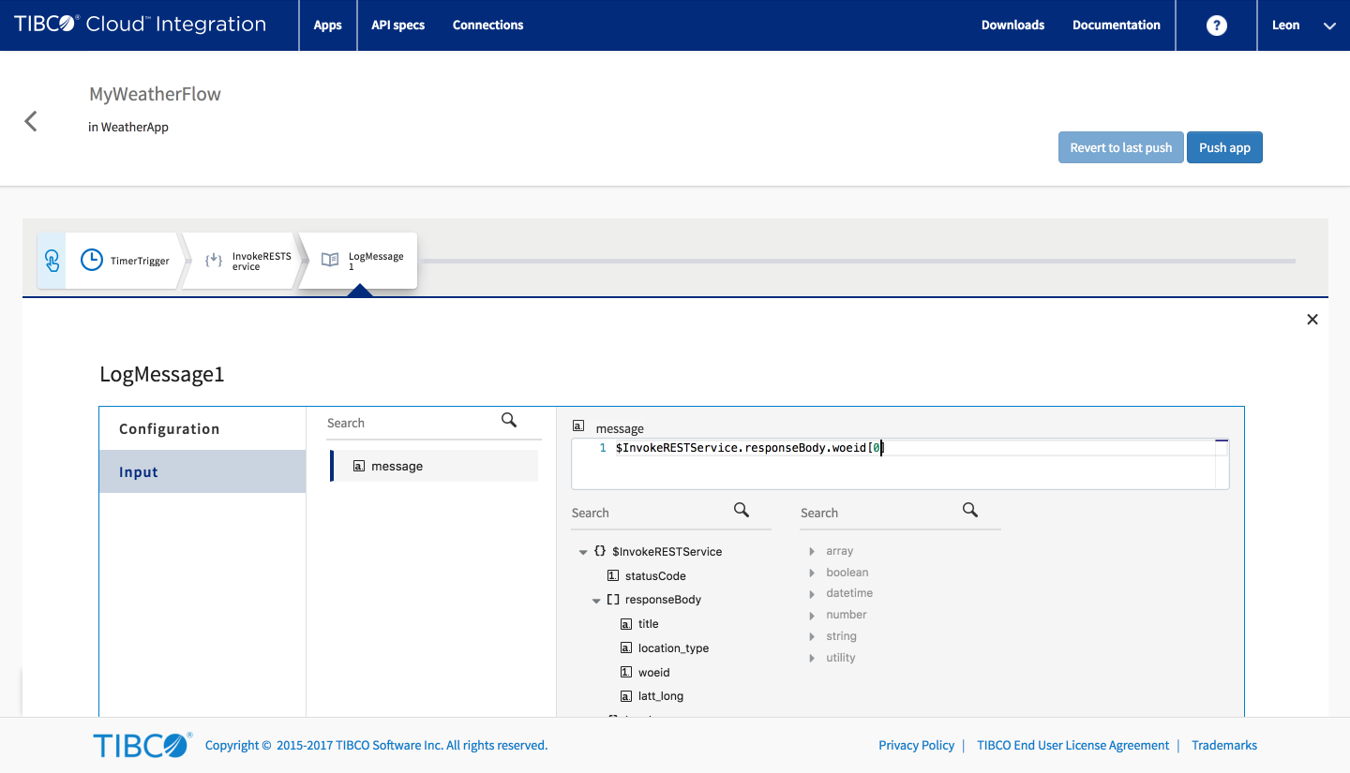
 Step 13: Let’s add a log activity to see some data in the logs as well. On the Input tab we’re only interested in the first WOEid, so the value we need on the right side is
 $InvokeRESTService.responseBody.woeid[0].
Add a second API call
A single API call is fun and can be extremely useful, but let’s use the output of the first call and invoke another API.
Step 14: Check out the MetaWeather API for Location. The URL pattern is for this one is /api/location/{woeid} (which should also explain why the WOEis was so interesting just now :))
 Step 15: This is what a sample response looks like (slightly longer than the previous one, but it contains so much more cool data)
 Step 16: Add another
 InvokeRESTService tile and paste the URL for the location, make sure the woeid is in curly braces {}. The URL this time will be https://www.metaweather.com/api/location/{woeid}
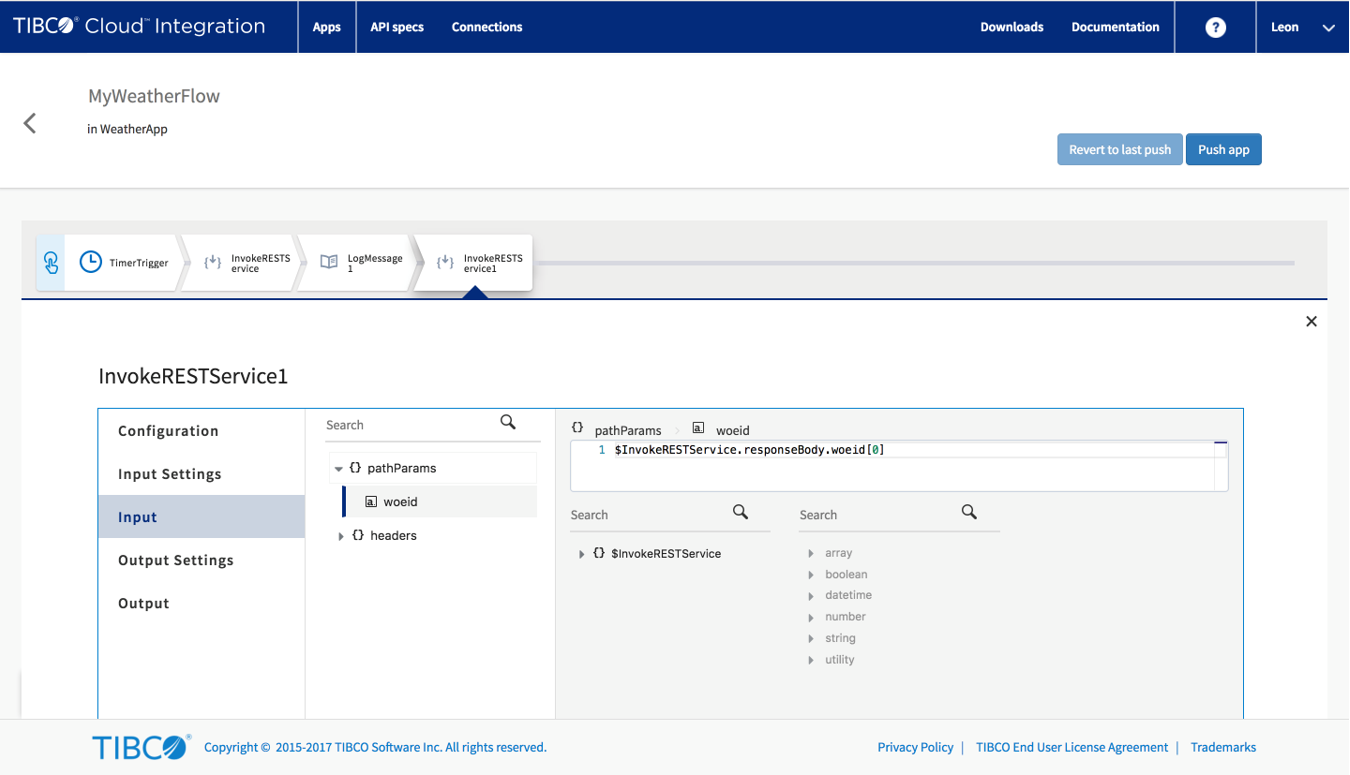
 Step 17: The curly braces are Path parameters and on the Input Settings tab you can now map the first occurrence of woeid from the other step to this one. The input will be the same as we used in step 13:
 $InvokeRESTService.responseBody.woeid[0]
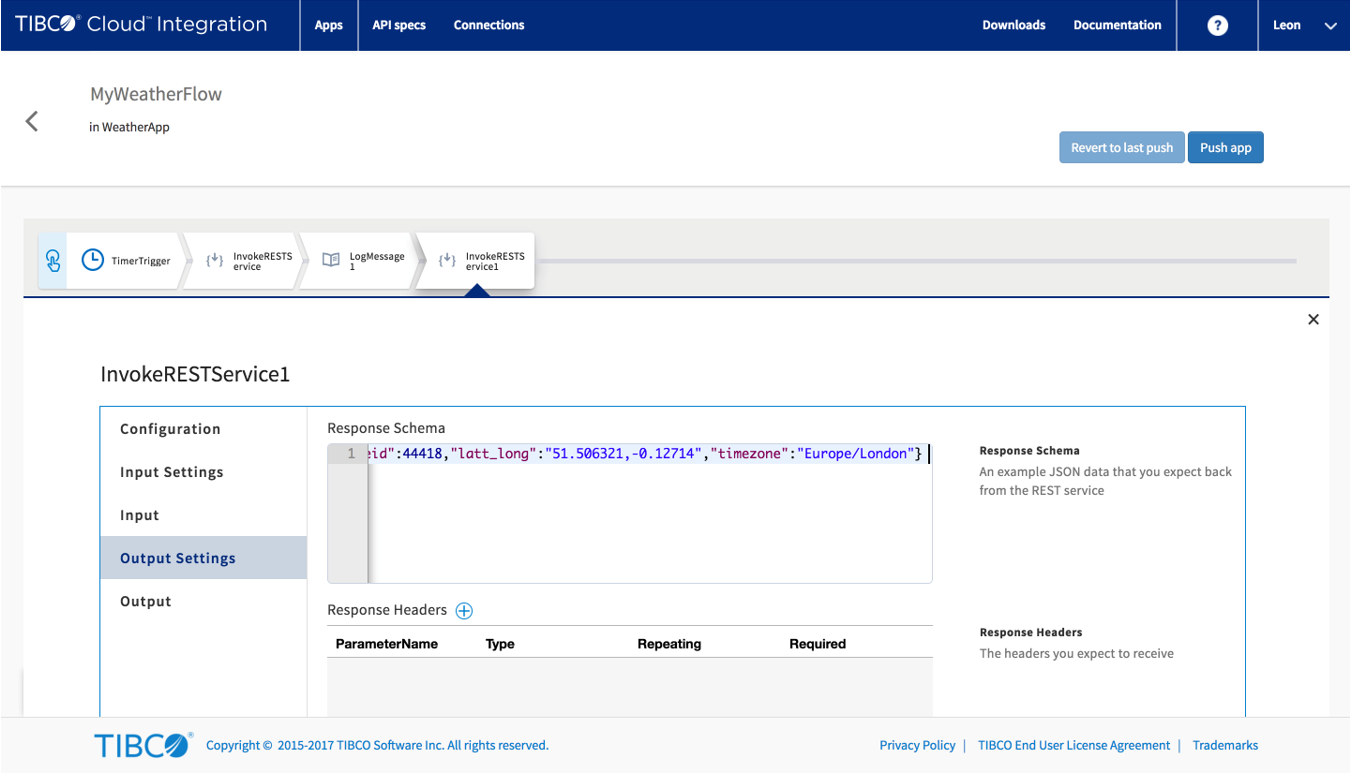
 Step 18: On the Output Settings, paste the sample response from the MetaWeather API (the data we gathered earlier in step 15)
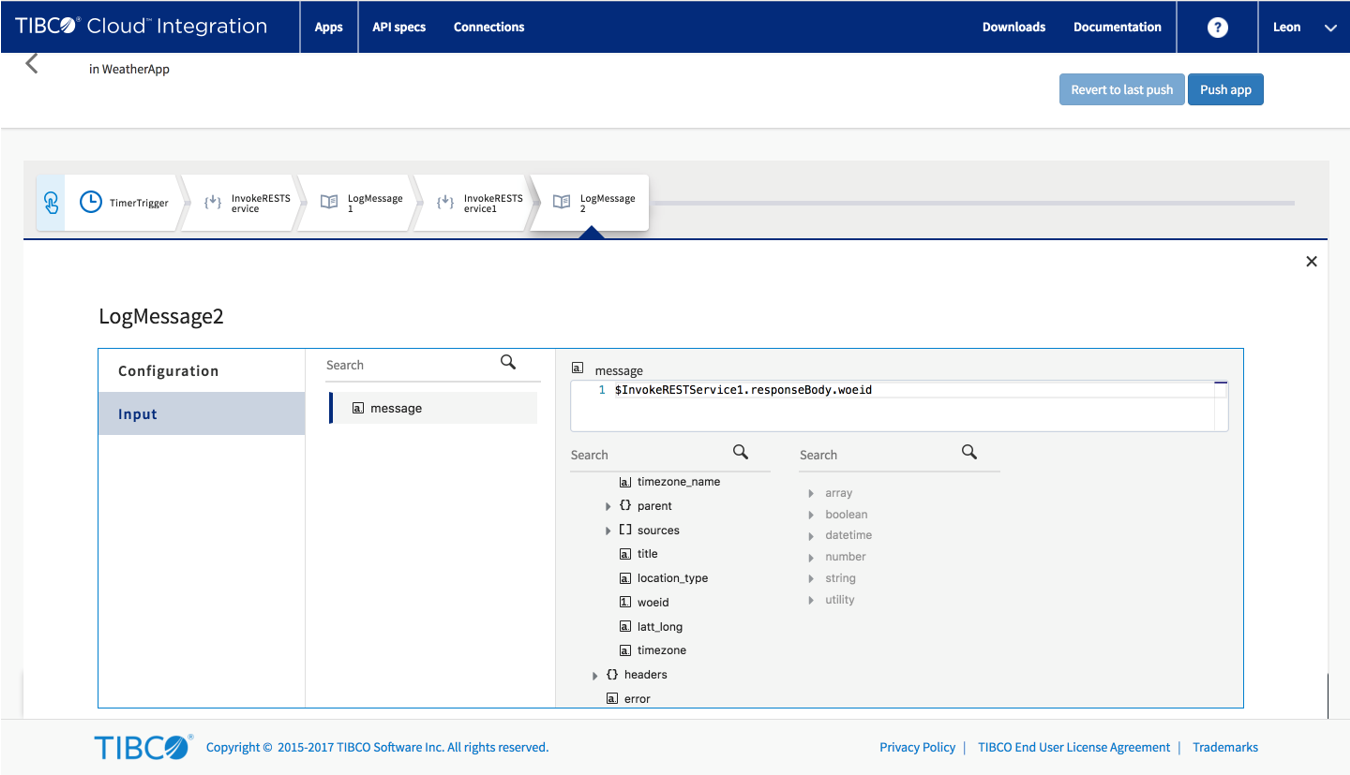
 Step 19: Let’s add another log step and log the WOEid from that one as well to make sure it still is the same city we’re talking about.
 Step 20: Push the app and go to the logs tab to see the result! As a good next step, try to modify the second log step so it shows a bit more information.
Conclusion
Even though APIs are commonplace in most areas, you used to need a lot of programming skills to orchestrate them into something meaningful. With the Web Integrator you can easily make use of the sample messages most APIs have to create a cool new feature for your business! As always let me know your thoughts on this tutorial either by commenting below or posting something on the TIBCO Community!